Introduction
Did you know that 38% of users stop engaging with a website if the design looks outdated? A clean, modern login form can set the right impression for your users and showcase your skills as a web developer or designer.
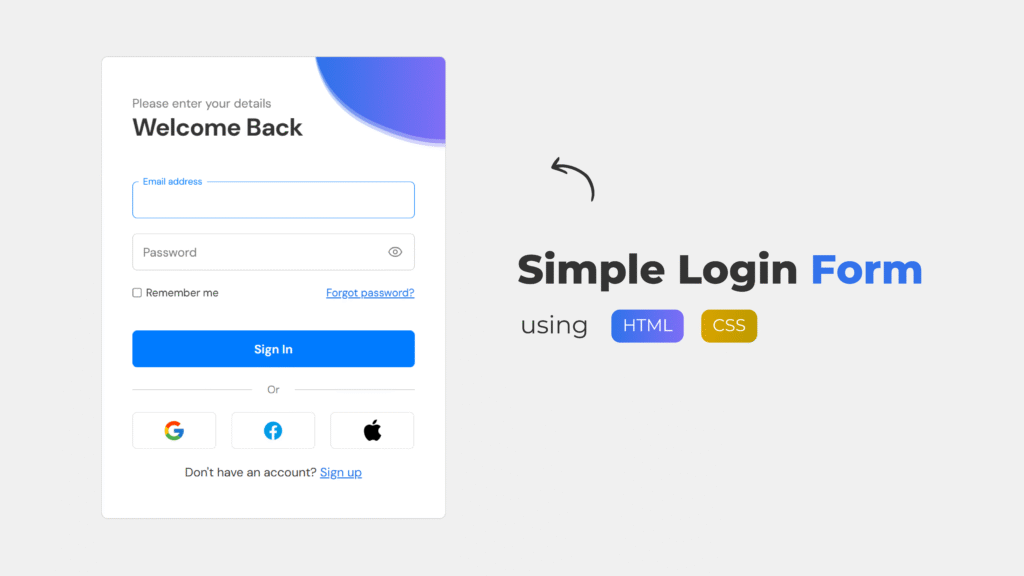
In this guide, you’ll learn step by step how to create a simple responsive login form in HTML & CSS with a touch of JavaScript for interactivity. By the end, you’ll have a professional, user-friendly form with:
- Floating labels
- Smooth animations
- Password toggle functionality
- A modern responsive design
Whether you’re a beginner practicing front-end development or you want a login form for your portfolio, client project, or real-world app, this tutorial is for you.
What You’ll Learn
By following this tutorial, you’ll gain:
- A strong understanding of HTML form structure
- Modern CSS styling techniques
- How to add animations for better UX
- A JavaScript-powered password toggle
- Tips for customizing and making it your own
Step 1: Setting Up the HTML Structure
Your HTML file provides the backbone of the login form. Below is a clean, semantic structure:
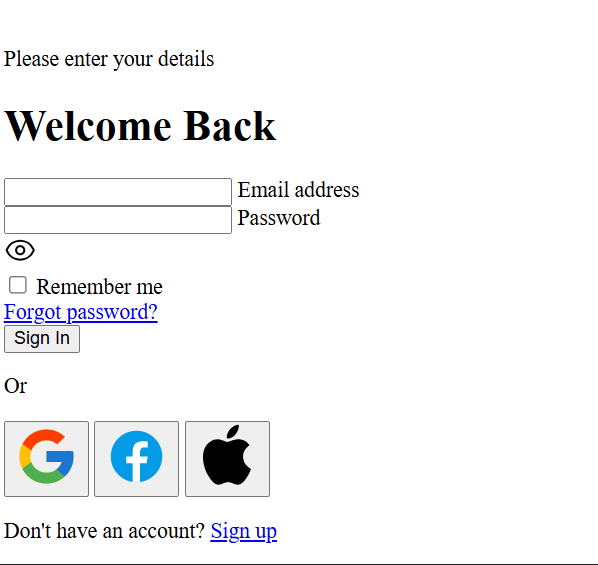
<!DOCTYPE html>
<html lang="en">
<head>
    <meta charset="UTF-8">
    <meta name="viewport" content="width=device-width, initial-scale=1.0">
    <title>Login form | Ludiflex</title>
    <link rel="stylesheet" href="assets/style.css">
    <link href='https://unpkg.com/boxicons@2.1.4/css/boxicons.min.css' rel='stylesheet'>
</head>
<body>
    <div class="container">
        <div class="form-container">
            <div class="form-blob">
                <img src="assets/images/blob.svg" alt="Blob" class="blob-image blob-image--1">
                <img src="assets/images/blob.svg" alt="Blob" class="blob-image blob-image--2">
                <img src="assets/images/blob.svg" alt="Blob" class="blob-image blob-image--3">
            </div>
            <div class="form-header">
                <p>Please enter your details</p>
                <h1>Welcome Back</h1>
            </div>
            <form class="form-box">
                <div class="input-group">
                    <input type="email" id="email" class="input-field" placeholder="" required>
                    <label for="email" class="floating-label">Email address</label>
                </div>
                <div class="input-group">
                    <input type="password" id="password" class="input-field" placeholder="" required>
                    <label for="password" class="floating-label">Password</label>
                    <div class="eye-icon" onclick="togglePassword()">
                        <svg xmlns="http://www.w3.org/2000/svg" width="24" height="24" viewBox="0 0 24 24" fill="none" stroke="currentColor" stroke-width="1.5" stroke-linecap="round" stroke-linejoin="round" class="lucide lucide-eye-icon lucide-eye"><path d="M2.062 12.348a1 1 0 0 1 0-.696 10.75 10.75 0 0 1 19.876 0 1 1 0 0 1 0 .696 10.75 10.75 0 0 1-19.876 0"/><circle cx="12" cy="12" r="3"/></svg>
                    </div>
                </div>
                <div class="input-group checkbox-group">
                    <div class="form-col remember-me">
                        <input type="checkbox" id="remember-me-checkbox" class="checkbox-field">
                        <label for="remember-me-checkbox">Remember me</label>
                    </div>
                    <div class="form-col">
                        <a href="#" class="form-link">Forgot password?</a>
                    </div>
                </div>
                <button type="submit" class="form-btn form-btn--submit">Sign In</button>
            </form>
            <div class="form-divider">
                <p>Or</p>
            </div>
            <div class="form-bottom">
                <div class="form-socials">
                    <button type="button" class="form-btn form-btn--social">
                        <img src="assets/images/google.svg" class="btn-icon" alt="">
                    </button>
                    <button type="button" class="form-btn form-btn--social">
                        <img src="assets/images/facebook.svg" class="btn-icon" alt="">
                    </button>
                    <button type="button" class="form-btn form-btn--social">
                        <img src="assets/images/apple.svg" class="btn-icon" alt="">
                    </button>
                </div>
                <p>Don't have an account? <a href="#" class="form-link">Sign up</a></p>
            </div>
        </div>
    </div>


    <script>
      // The javascript codes will go here
    </script>

</body>
</html>

Step 2: Styling the Form with CSS
Now, let’s make it look beautiful and responsive using CSS.
/* FONTS */

@import url("https://fonts.googleapis.com/css2?family=DM+Sans:ital,opsz,wght@0,9..40,100..1000;1,9..40,100..1000&display=swap");

:root {
  --color-background: #f0f0f0;
  --color-text: #333;
  --color-border: #ccc;
  --color-placeholder: #777;
  --color-primary: #007bff;
  --color-primary-hover: #0056b3;
  --color-link: #1a73e8;
  --color-divider: #ddd;
  --color-social-hover: #f0f0f0;
  --color-floating-label: #5f6368;
  --color-white: #fff;
}

* {
  margin: 0;
  padding: 0;
  box-sizing: border-box;
  font-family: "DM Sans", sans-serif;
}

body {
  background-color: var(--color-background);
  color: var(--color-text);
}

.container {
  display: flex;
  align-items: center;
  justify-content: center;
  height: 100vh;
  padding: 20px;
}

.form-container {
  position: relative;
  background-color: var(--color-white);
  padding: 50px 40px;
  width: 100%;
  max-width: 450px;
  border-radius: 8px;
  border: 1px solid var(--color-border);
  overflow: hidden;
}

.form-header {
  position: relative;
  z-index: 1;
}

.form-header p {
  color: var(--color-placeholder);
}

.form-header h1 {
  font-size: 32px;
}
.form-box {
  display: flex;
  flex-direction: column;
  gap: 20px;
  margin-top: 50px;
}
.input-group {
  position: relative;
  display: flex;
}
.input-field {
  height: 48px;
  padding-inline: 14px;
  border: 1px solid var(--color-border);
  border-radius: 6px;
  width: 100%;
  outline: none;
}
.floating-label {
  position: absolute;
  top: 50%;
  left: 8px;
  transform: translateY(-50%);
  color: var(--color-placeholder);
  background-color: var(--color-white);
  padding-inline: 6px;
  transition: all 0.3s ease;
  pointer-events: none;
}
.input-field:focus ~ .floating-label,
.input-field:not(:placeholder-shown) ~ .floating-label {
  top: 0;
  left: 8px;
  transform: translateY(-50%);
  font-size: 12px;
  color: var(--color-primary);
}
.input-field:focus {
  border-color: var(--color-primary);
}
.input-field:not(:focus):not(:placeholder-shown) ~ .floating-label {
  color: var(--color-floating-label);
}
.eye-icon {
  position: absolute;
  right: 15px;
  top: 50%;
  display: flex;
  transform: translateY(-50%);
}
.eye-icon svg {
  width: 20px;
  height: 20px;
  cursor: pointer;
  color: var(--color-placeholder);
}
.checkbox-group {
  display: flex;
  justify-content: space-between;
  gap: 10px;
  font-size: 14px;
}
.remember-me {
  display: flex;
  align-items: center;
  gap: 5px;
}
.form-btn {
  display: flex;
  justify-content: center;
  align-items: center;
  gap: 10px;
  height: 48px;
  background: none;
  border: none;
  outline: none;
  border-radius: 6px;
  cursor: pointer;
  padding-inline: 8px;
}
.form-btn--submit {
  background-color: var(--color-primary);
  color: var(--color-white);
  font-size: 16px;
  font-weight: 600;
  margin-top: 20px;
  transition: background-color 0.3s ease;
}
.form-btn--submit:hover {
  background-color: var(--color-primary-hover);
}
.form-bottom {
  display: flex;
  flex-direction: column;
  justify-content: center;
  align-items: center;
  gap: 20px;
  margin-top: 20px;
}
.form-socials {
  width: 100%;
  display: grid;
  grid-template-columns: repeat(3, 1fr);
  gap: 20px;
}
.form-btn--social {
  border: 1px solid var(--color-divider);
  transition: 0.3s ease;
}
.form-btn--social:hover {
  background-color: var(--color-social-hover);
}
.btn-icon {
  width: 30px;
}
.form-link {
  color: var(--color-link);
}
.form-link:hover {
  text-decoration: none;
}
.form-divider {
  display: flex;
  align-items: center;
  gap: 20px;
  font-size: 14px;
  color: var(--color-placeholder);
  margin-top: 20px;
}
.form-divider::before,
.form-divider::after {
  content: "";
  flex: 1;
  height: 1px;
  background-color: var(--color-divider);
}
.form-blob {
  position: absolute;
  width: 200px;
  height: 200px;
  top: 0;
  right: 0;
  z-index: 0;
}
.blob-image {
  position: absolute;
  rotate: 205deg;
  pointer-events: none;
  opacity: 0;
  transform: scale(0.5) translateX(100px);
}
.blob-image--1 {
  top: -170px;
  right: -150px;
  animation: welcomeIn 1.2s ease-out 0.3s forwards;
  --final-opacity: 1;
}
.blob-image--2 {
  top: -165px;
  right: -150px;
  animation: welcomeIn 1.2s ease-out 0.6s forwards;
  --final-opacity: 0.6;
}
.blob-image--3 {
  top: -160px;
  right: -150px;
  animation: welcomeIn 1.2s ease-out 0.9s forwards;
  --final-opacity: 0.3;
}
@media (max-width: 480px) {
  .form-container {
    padding: 60px 30px;
  }
}

/* BLOB ANIMATION */
@keyframes welcomeIn {
  0% {
    opacity: 0;
    transform: scale(0.5) translateX(100px) rotate(180deg);
  }
  60% {
    opacity: calc(var(--final-opacity) * 0.8);
    transform: scale(1.1) translateX(-10px) rotate(200deg);
  }
  100% {
    opacity: var(--final-opacity);
    transform: scale(1) translateX(0px) rotate(205deg);
  }
}
Step 3: Adding the Password Toggle
Interactivity matters! Let’s add a small script to allow users to toggle password visibility.
            function togglePassword() {
                const passwordInput = document.getElementById("password")
                const eyeIcon = document.querySelector(".eye-icon")

                if (passwordInput.type === "password") {
                    passwordInput.type = "text"
                    eyeIcon.innerHTML = `<svg xmlns="http://www.w3.org/2000/svg" width="24" height="24" viewBox="0 0 24 24" fill="none" stroke="currentColor" stroke-width="1.5" stroke-linecap="round" stroke-linejoin="round" class="lucide lucide-eye-off-icon lucide-eye-off"><path d="M10.733 5.076a10.744 10.744 0 0 1 11.205 6.575 1 1 0 0 1 0 .696 10.747 10.747 0 0 1-1.444 2.49"/><path d="M14.084 14.158a3 3 0 0 1-4.242-4.242"/><path d="M17.479 17.499a10.75 10.75 0 0 1-15.417-5.151 1 1 0 0 1 0-.696 10.75 10.75 0 0 1 4.446-5.143"/><path d="m2 2 20 20"/></svg>`;
                } else {
                    passwordInput.type = "password"
                    eyeIcon.innerHTML = `<svg xmlns="http://www.w3.org/2000/svg" width="24" height="24" viewBox="0 0 24 24" fill="none" stroke="currentColor" stroke-width="1.5" stroke-linecap="round" stroke-linejoin="round" class="lucide lucide-eye-icon lucide-eye"><path d="M2.062 12.348a1 1 0 0 1 0-.696 10.75 10.75 0 0 1 19.876 0 1 1 0 0 1 0 .696 10.75 10.75 0 0 1-19.876 0"/><circle cx="12" cy="12" r="3"/></svg>`;
                }
            }
Pro Tips for Customization
- Change Colors: Modify
--color-primaryfor branding. - Add Social Logins: Insert Google, Facebook, or Apple buttons.
- Improve Security: Add client-side validation with JavaScript.
- Accessibility: Ensure labels are properly linked with
forandid.
Conclusion
And there you have it! You’ve just built a simple responsive login form in HTML & CSS with animations, floating labels, and a JavaScript-powered password toggle. This is a great project to sharpen your frontend development skills and add to your portfolio.
Now it’s your turn: Customize the colors, add branding, or even link it to a backend to make it fully functional.
If you found this tutorial helpful, don’t forget to share it on social media, drop your feedback in the comments, and subscribe to Ludiflex for more web development tutorials.

